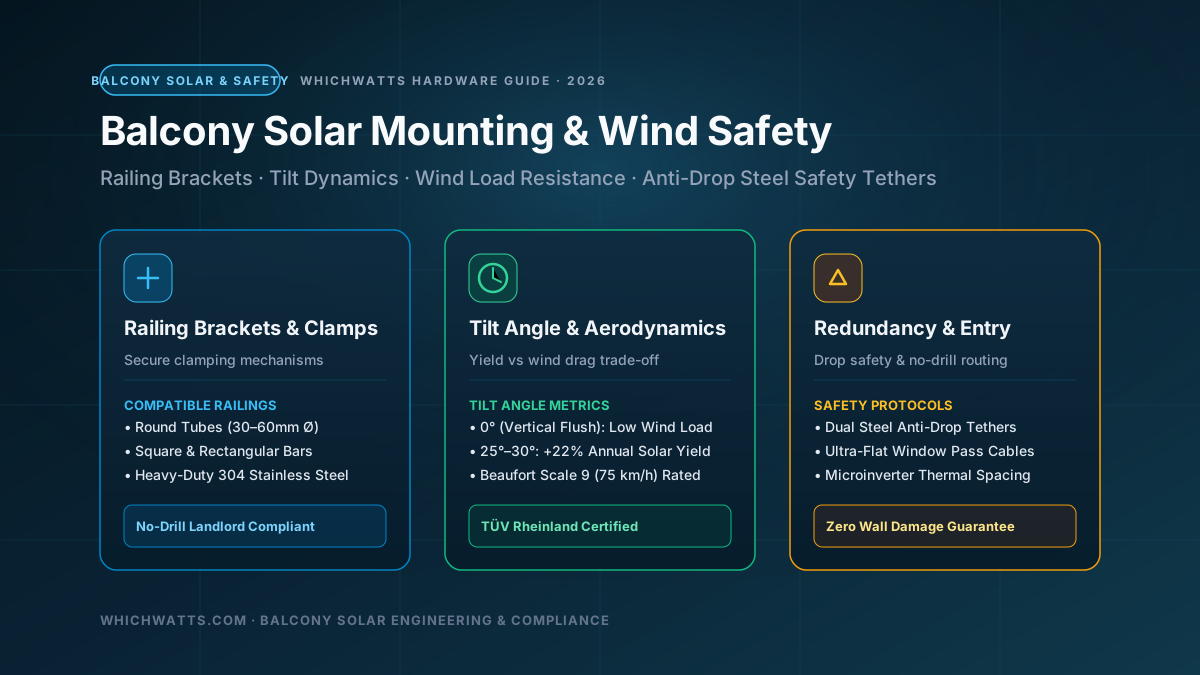
Direct answer: A comprehensive apartment and tenant engineering guide to mounting plug-in solar panels on balcony railings safely, covering bracket types, wind load dynamics, anti-drop tethers, and no-drill window cable entry.
Editorial note: WhichWatts is an independent comparison site. Prices, availability, specifications, and retailer promotions change frequently. Check the live product table and retailer page before buying.
Balcony Solar Panel Mounting Guide: Railing Brackets, Wind Load & Apartment Safety
Following the expansion of the UK's 800W G98 plug-in solar regulations and broad adoption across Europe, thousands of apartment tenants and flat leaseholders are converting small balconies into miniature personal power plants. By clipping two 400W–500W solar panels to an exterior balustrade and plugging an inverter into a domestic socket, urban households can offset between £220 and £380 of grid electricity every year.
However, moving solar generation from a low-profile residential roof to a high-rise apartment balcony introduces serious mechanical and structural risks. A standard rigid solar panel measures roughly 1.7m by 1.1m (nearly 20 square feet) and weighs between 18kg and 22kg. In a sudden 80 km/h autumn gale or coastal windstorm, that panel acts exactly like a sail, generating upwards of 150 kilograms of lateral aerodynamic force against your balcony railing.
If a bracket fails on the fourth floor of an urban apartment block, the consequences are catastrophic.
This engineering and practical tenant guide breaks down the physical mechanics of balcony solar installations: choosing the correct bracket clamp for your specific balustrade profile, calculating wind load trade-offs across tilt angles, installing redundant anti-drop steel tethers, routing solar DC cables without drilling holes, and securing landlord and freeholder approval.
[Balcony Handrail] ──── Heavy-Duty 304 Stainless Clamps ────> [Upper Panel Frame]
        │                                                               │
   Railing Post                                             Adjustable Tilt Strut (0° - 30°)
        │                                                               │
[Balcony Bottom Bar] ── Bottom Clamps + Stainless Back-Plate ──> [Lower Panel Frame]
        │                                                               │
[Structural Concrete] ◄── Aircraft-Grade 3mm Steel Tether Cable ────────┘
1. Railing Profiles & Clamp Selection: What Works on Your Balcony?
Never use generic zip ties, bungee cords, or lightweight television brackets to mount solar panels outdoors. Balcony mounting systems must withstand continuous UV radiation, seasonal thermal expansion, vibrational fatigue, and cyclic wind buffeting.
Your balustrade geometry determines the exact mechanical clamp design:
| Balcony Railing Type | Recommended Bracket Mechanism | Maximum Tube / Profile Dimension | Key Safety Requirement |
|---|---|---|---|
| Round Steel / Aluminum Handrail | Contoured U-bolt clamps with EPDM rubber isolator sleeves | 30mm to 60mm diameter | Anti-rotation tooth washers; rubber sleeve prevents marring and galvanic metal corrosion. |
| Square / Rectangular Metal Bar | Heavy-duty two-piece compression clamping plates with M8 hex bolts | 30mm to 80mm width | 3mm+ thick 304 stainless steel; dual locking bolts per clamp point. |
| Vertical Spindle / Picket Balustrade | Backing plate clamping through spindle gaps | Spindle spacing: 50mm to 120mm | Large surface area backing plates spanning across at least two vertical spindles. |
| Solid Concrete / Masonry Parapet | Non-invasive over-wall saddle hooks OR interior ballast floor tubs | Parapet width: 100mm to 250mm | Saddle brackets must feature adjustable locking set screws on the interior balcony face. |
| Glass Balustrade Panels | ⚠️ DO NOT CLAMP TO GLASS. Use free-standing floor ballast mounts only | N/A | Clamping directly to structural or laminated glass creates localized point stress and shatters panels under wind gusts. |
Pro-Tip on Galvanic Corrosion: If your balcony balustrade is made of painted aluminum or mild steel, never bolt raw stainless steel brackets directly against the bare metal without an insulating barrier. Always use EPDM rubber pads or nylon isolation sleeves. Without insulation, rain and atmospheric salt create an electrochemical battery, causing rapid galvanic corrosion that pits and weakens the railing metal within months.
2. Wind Load Aerodynamics & The Tilt Angle Dilemma
The single biggest engineering compromise in balcony solar is balancing solar irradiance yield against aerodynamic drag:
In the UK and Northern Europe (latitudes 50°N to 58°N), the optimal astronomical tilt angle for capturing maximum solar energy is roughly 30° to 35° from horizontal. However, projecting a 2-meter rigid panel outward at a 30° angle turns it into a massive airfoil.
Wind Force (F) = 0.5 × Air Density (ρ) × Wind Velocity² (v²) × Panel Area (A) × Drag Coefficient (Cd)
At high wind speeds, force scales with the square of wind velocity:
- At 40 km/h (25 mph, Moderate Breeze): Lateral wind force on an 800W dual-panel array (3.8 m²) is approximately 280 Newtons (~28 kg of force).
- At 80 km/h (50 mph, Gale Force 9): Lateral wind force jumps to 1,120 Newtons (~114 kg of force).
- At 100 km/h (62 mph, Severe Storm Force 10): Force reaches an astonishing 1,750 Newtons (~178 kg of thrust) against the balcony anchors.
Vertical Flush (90°) vs Tilted (25°–30°) Mounting:
| Mounting Angle | Annual Solar Harvest vs Optimal | Wind Drag & Overturning Torque | High-Rise Suitability (Floors 3+) | Visual Profile from Street |
|---|---|---|---|---|
| Vertical Flush (90° to ground / 0° tilt) | 75% to 80% (-22% summer loss, +8% winter gain) | Minimal. Air flows smoothly past the vertical facade; zero overturning lever arm. | ✅ Highly Recommended for any apartment above the 2nd floor or coastal flats. | Discreet, modern appearance; sits flush with the building envelope. |
| Slight Tilt (15° to 20°) | 88% to 92% | Moderate. Manageable uplift; requires heavy-duty triangulated alloy struts. | ⚠️ Suitable for floors 1–3 in sheltered inland suburban locations. | Noticeable projection (extends ~25cm beyond balcony handrail). |
| Full Optimal Tilt (30° to 35°) | 98% to 100% | Severe. High aerodynamic lift and railing torsion during gale gusts. | ❌ High Risk. Never use on upper floors without structural engineering sign-off. | Conspicuous; frequently triggers tenant association or council complaints. |
The Expert Verdict: For almost all apartment renters and flat owners, mounting panels vertically flush against the balustrade (or at a modest 10°–15° angle) is the safest choice. While you sacrifice roughly 18% to 22% of theoretical peak summer generation, you gain 100% mechanical stability, eliminate wind-whistle noise, drastically reduce visual intrusion, and actually improve winter generation when the sun stays low on the southern horizon.
3. Redundant Safety: The Aircraft-Grade Anti-Drop Steel Tether
In aviation and commercial rigging, single-point failures are strictly prohibited. A balcony solar system must operate on the exact same safety principle. Even if a mounting clamp snaps, a bolt vibrates loose, or a metal fatigue crack forms during a winter storm, the solar panel must never fall to the street below.
How to Install Secondary Safety Tethers:
- Source 3mm or 4mm Braided 316 Stainless Steel Wire Rope: Rated for a minimum breaking strain of 500 kg (5,000 N).
- Loop Around the Internal Solar Panel Frame: Feed the steel cable through the pre-drilled M8 mounting holes in the panel's extruded aluminum frame, securing it with a copper crimp sleeve or drop-forged wire rope clamp.
- Anchor Directly to Balcony Structural Posts: Loop the opposite end of the steel cable around a primary structural balcony post or solid concrete floor anchor—not around the removable handrail clamp.
- Leave Minimal Slack: Keep the tether taut enough that if the main clamp fails, the panel can drop no more than 3 to 5 centimeters, avoiding high-velocity shock-load deceleration.
Every reputable balcony solar manufacturer (including EcoFlow, Anker SOLIX, and Zendure) now bundles dual stainless steel safety tethers with their official railing kits. If your kit did not include them, purchase marine rigging wire before completing your install.
4. No-Drill Cable Entry: Ultra-Flat Window Ribbon Cables
The next hurdle facing renters and apartment dwellers is getting the DC solar cables from the exterior balcony panels into the living room or kitchen socket without drilling through walls.
Drilling through exterior cavity walls, brickwork, or uPVC window frames is strictly prohibited under standard tenancy agreements and can invalidate building damp-proof warranties.
[Exterior Solar Panel] ── Standard MC4 Cable ──> [Ultra-Flat Window Ribbon] ── Door Weatherstrip ──> [Indoor Inverter / Battery]
                                                          │
                                                <0.2mm Copper Layer
                                                Closed & Locked Window
The modern solution is the Ultra-Flat MC4 Window Pass-Through Cable:
- Cross-Sectional Profile: An ultra-thin, highly flexible laminated copper strip less than 0.2 millimeters thick, encased in durable insulating Teflon/PET film.
- Weather-Seal Integration: The ribbon rests directly across the bottom rubber weatherstrip sill of your balcony door or double-glazed casement window.
- Sealing & Locking: The window or patio door closes and locks firmly over the ribbon without pinching, cutting, or breaking the vacuum seal of double glazing.
- Electrical Capacity: Quality flat window cables (such as EcoFlow’s flat cable pair) easily handle up to 15 Amps DC and 60 Volts, allowing up to 900W of solar power to pass safely indoors with negligible resistance losses (<0.5%).
5. Microinverter Mounting & Heat Dissipation
Your plug-in microinverter (such as an Hoymiles HMS-800, Deye, or EcoFlow PowerStream) converts the panels' low-voltage DC power into 230V AC grid electricity. During peak summer midday operation, a microinverter operates at roughly 96% efficiency, which means 30 to 40 watts of heat energy must be dissipated into ambient air.
- Do Not Sandwich Microinverters Directly Against the Panel Backsheet: The rear black sheet of a solar panel in direct sunlight can reach 70°C (158°F). If a microinverter is clamped flush against it without airflow, internal thermal throttling will drop inverter power by 40% to protect the electronics.
- Maintain a 5cm–10cm Air Chimney: Mount the microinverter to the lower balcony railing bar or the bracket cross-strut behind the panel, leaving a minimum 5cm gap for convective airflow.
- Orient Cable Junctions Downward: Mount the inverter so that all MC4 DC inputs and AC Betteri/Schuko connectors point toward the ground. This prevents water droplets from pooling around rubber gaskets and using capillary action to creep into electrical terminals.
6. Recommended Balcony Mounting Systems (2026)
When choosing brackets, stick to systems that carry explicit TÜV Rheinland structural certification and use heavy-gauge 304 or 316 stainless steel and anodized aluminum:
- Anker SOLIX Universal Balcony Railing Bracket Kit: Features aircraft-grade aluminum alloy struts, adjustable tilt settings from 0° (vertical flush) to 30°, rubberized handrail clamping sleeves, and included dual steel safety tethers.
- EcoFlow Balcony Hook & Angle Bracket System: Engineered specifically for 400W rigid panels, offering tool-free hook-over railing installation with locking lower compression clamps and integrated microinverter mounting plates.
- Zendure Universal Balcony Railing Mount: Highly adaptable clamp mechanism accommodating round pipes up to 60mm and rectangular balustrades up to 80mm, with quick-release angle adjustment pins.
- EcoFlow MC4 Ultra-Flat Window Pass-Through Cable Pair: Durable 0.2mm laminated copper ribbons designed for standard patio doors and casement windows, rated for up to 15A continuous current.
7. Landlord, Freeholder & Planning Permission Checklist
Before purchasing your kit, verify building covenants and legal guidelines:
- UK Permitted Development: In the UK, small solar installations on residential buildings generally fall under Permitted Development Rights (PDR), meaning full planning permission is not required provided panels do not protrude excessively or sit on Listed Buildings / Conservation Areas.
- Freeholder & Leasehold Clauses: Many leasehold apartment blocks have "Aesthetic Harmony" covenants prohibiting drying laundry or hanging flags on balconies. Presenting your landlord with a vertical flush-mounted design (which looks sleek and unobtrusive from street level) and demonstrating a 100% no-drill installation dramatically improves approval odds.
- Structural Liability: Assure your freeholder or landlord that the system incorporates TÜV-certified stainless steel brackets, anti-drop secondary tethers, and zero structural alterations to the building facade.
Helpful Next Steps & Tools
- Sizing your balcony system? Model your daily sunshine and panel orientation with our Solar Panel Calculator.
- Pairing panels with battery storage? Explore runtime options on our Power Station Calculator.
- Compare current solar kits and cost-per-watt metrics in our Live Price Comparison Table.
- Check our comprehensive guide on UK Plug-In Solar Laws Explained (2026): G98 Regulations.
FAQ
Can I install plug-in solar panels on an apartment balcony if I rent?
Yes. Under modern 2026 UK and European regulations, plug-in solar systems are classed as portable consumer appliances rather than permanent building modifications. By using clamp-on railing brackets, non-invasive floor ballast mounts, and ultra-flat window pass-through cables, the entire system can be installed and later removed without drilling a single hole or causing any structural damage. Always check your tenancy agreement and obtain landlord consent for external balcony additions.
What happens to balcony solar panels in high winds or severe storms?
When installed with certified brackets and locked into a vertical flush position (90° against the railing), solar panels experience low aerodynamic drag, similar to solid balcony privacy cladding. If panels are mounted on adjustable angle struts, fold them flat against the balustrade ahead of forecasted gale-force winds (over 70 km/h / Force 8). Never install balcony panels without secondary braided stainless steel safety tethers anchored to primary structural posts.
Does vertical flush mounting (90°) ruin solar electricity generation?
No. While vertical mounting loses roughly 18% to 22% of theoretical peak summer generation compared to a 30° tilted roof, it still generates substantial electricity. Furthermore, vertical panels perform exceptionally well during autumn, winter, and early spring when the sun sits low in the sky, and they prevent snow, leaves, and dust from accumulating on the glass.
Can I clamp solar panels directly onto a glass balcony balustrade?
No. Never clamp solar brackets directly onto glass balustrade panels. Glass balustrades are designed for uniform lateral pressure, not the intense, localized rotational torque exerted by solar brackets catching gusting winds. On balconies with glass balustrades, use weighted floor ballast tubs or interior terrace triangular frames that rest on the concrete floor slab without contacting the glass.